
Get to Know Your New Facilitator Guide
What You Need to Know to Work with LeaderGuide Pro in Word.
Once you complete the setup of your new facilitator guide and save it ...
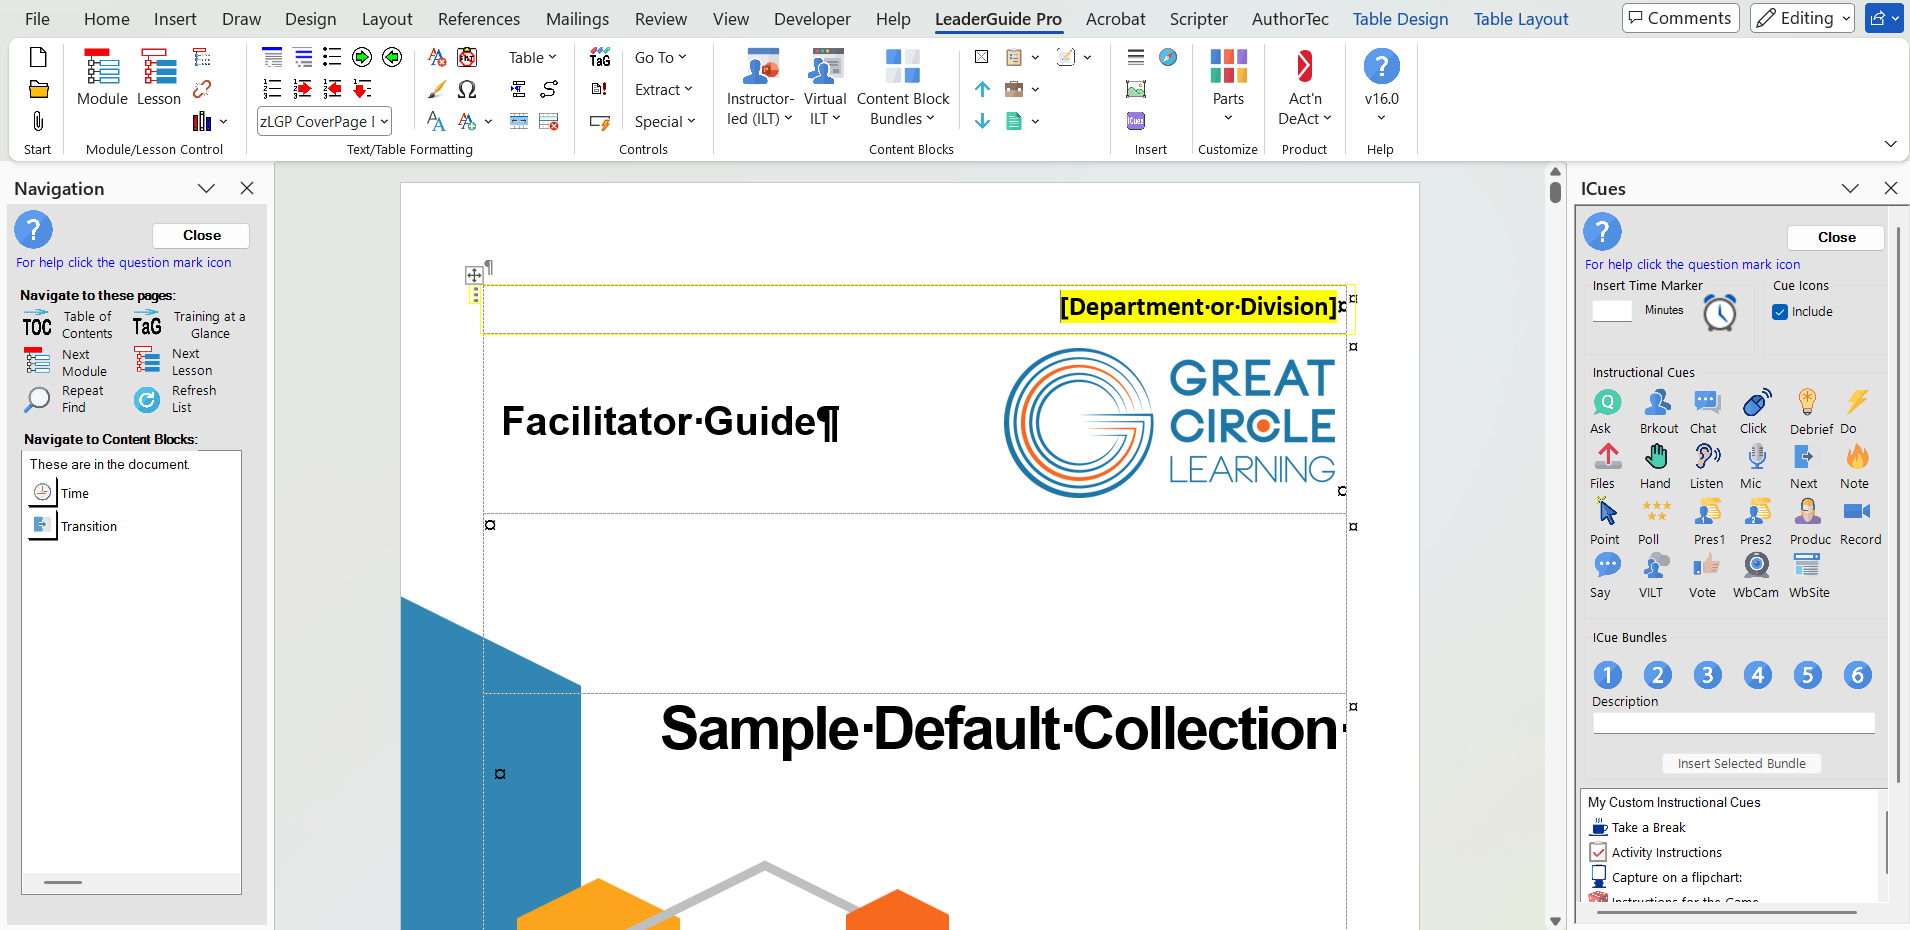
You will see your new facilitator guide as a Word document in the middle of your screen. You will also see:
The LeaderGuide Pro ribbon along the top of the screen.
-
Keep this ribbon showing. You must use it to build out your facilitator guide.
The Navigation pane on the left side of your screen.
-
You can close and re-open this as needed by clicking the Navigation button in the Insert group on the ribbon.
-
You can also navigate using the Go To button in the Controls group on the ribbon.
The ICues pane on the right side of your screen.
-
You can close and re-open this as needed by clicking the ICues button in the Insert group on the ribbon.
-
ICues are small icons and preformatted text strings you can use to prompt the Facilitator and, if running VILT, the Producer.
The Cover page in the middle of your screen.
-
This page is followed by at least 12 more pages, depending on the Guidebook Design Template you chose when setting up this new document.
-
The extra "stuff" you see are Word's non-printing formatting marks, which LeaderGuide Pro turns on because they help you know exactly where your cursor is, and they sometimes hold important messages for you as the developer.

Everything in your new facilitator guide is there for a reason.
Resist the urge to start deleting or reformatting until you have a deeper understanding of what LeaderGuide Pro does and how it helps you.
Given that you are in Word AND LeaderGuide Pro:
It is important to learn when you must use LeaderGuide Pro and when it is best to use Word. A good rule of thumb is to always use LeaderGuide Pro first.
Essentially, you will use Word to add text and to Save your work, and you will use LeaderGuide Pro for just about everything else.
Your new document contains three sections ...
And an optional fourth section. Let's take a look.

This first portion of your new facilitator guide includes:
-
Cover page
-
Acknowledgements page
-
Table of Contents
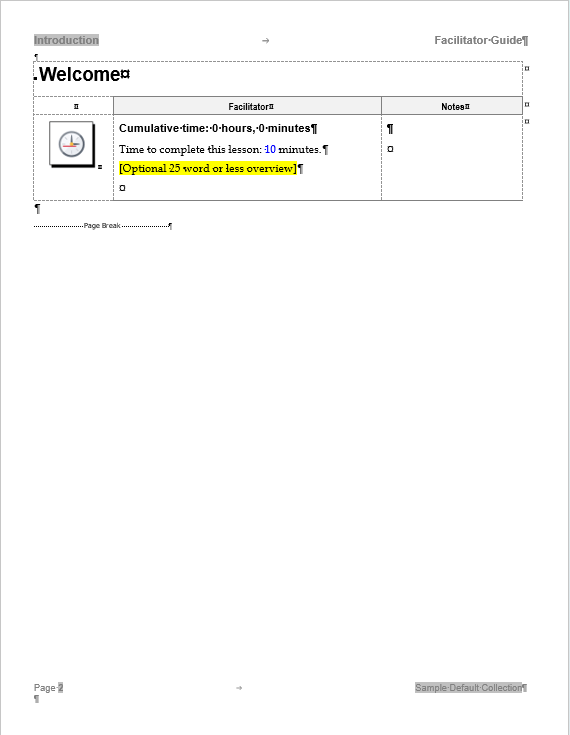
This second portion of your new facilitator guide contains:
-
About this Facilitator Guide/Getting Started
-
Icon/Graphic Cues
-
Training Program in Perspective
-
Training Program Preparation
-
Training at a Glance
This third section of your new facilitator guide contains the instructional material to be used by your facilitator to deliver the training:
-
First New Module
-
First New Lesson
-
Additional Lessons in Module
-
-
Next Module
-
First Lesson in Module
-
Additional Lessss in this Module
-
-
Subsequent Modules & Lessons
You have the option to add an Appendix as a fourth section to your facilitator guide. This section can hold reference materials for the facilitators and the participants.
Your New Facilitator Guide Page by Page
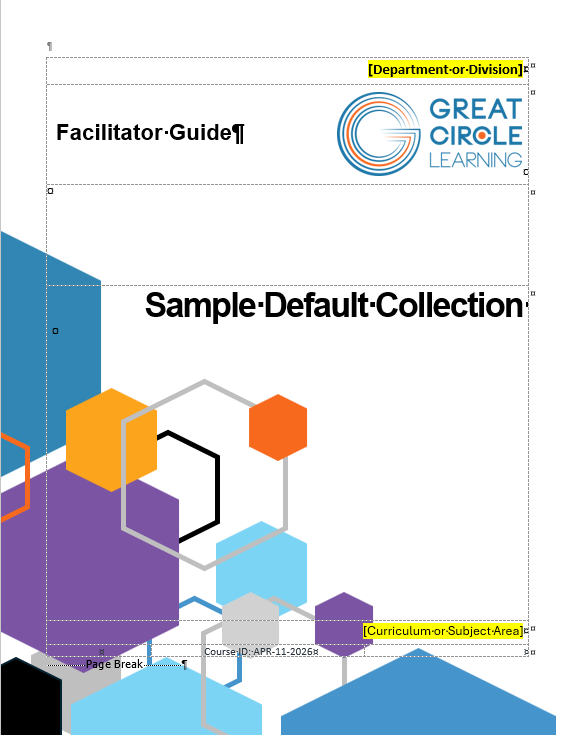
Cover Page
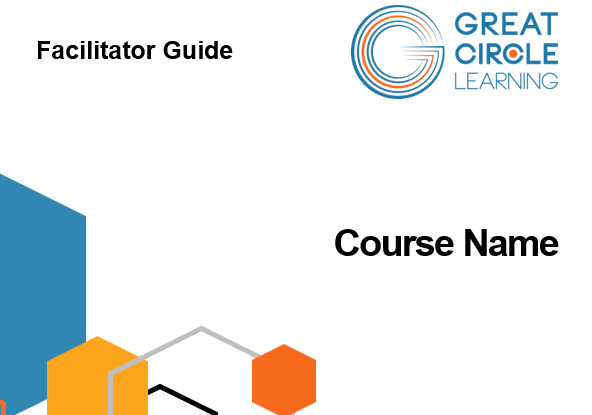
Your cover page may look different than the example shown here.
Depending on which Collection you chose when starting your new facilitator guide, your Cover page will display different layouts, graphics and fonts but they will all show and contain the following elements.
The extra "stuff" you see on the page are Word's formatting marks, which LeaderGuide Pro turns on.
-
The formatting marks are non-printing.
-
They help you know what style your cursor is sitting in and they sometimes hold important messages for you as the developer.
Every LeaderGuide Pro Cover page includes placeholders for:
-
Your logo
-
Document type (Facilitator Guide or Participant Guide)
-
Program Name (the name of your class/course/workshop)
-
Curriculum or Subject Area
-
Course ID
Note:
-
Anything highlighted in yellow can be typed over or deleted
-
Set your logo to appear on your cover pages by clicking Parts on the LeaderGuide Pro ribbon.
-
Select LeaderGuide Pro Preferences and edit the logo in the bottom right corner of the wizard.
-
At the bottom of the page you will see a Page Break
-
You can see this because Word's formatting marks are turned on
-
Do not delete the page break
-
Your Cover page should be just that - one page
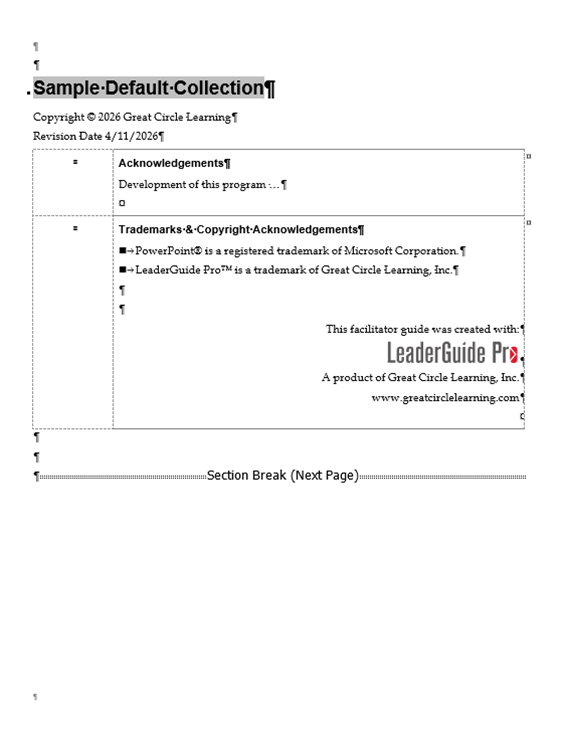
Acknowledgements
Do not delete this page.
This page is a placeholder for your copyright, legal and company information, and acknowledgements of contributors to the development of the training program.
What you are seeing on this page:
Word's formatting marks
Program Name (the name of the course) carried over from the Cover page.
-
Edit this name on the Cover page & then click Update All Fields in the Controls group on the LeaderGuide Pro ribbon to update the name on this page and elsewhere in this document.
Copyright information
-
Edit by clicking Parts on the ribbon. Select LeaderGuide Pro Preferences and edit the copyright information in the lower right portion of the Preferences wizard. Once set, your copyright will apply to all new LeaderGuide Pro documents you create.
-
The copyright is repeated in the odd-numbered page footers in this document.
Revision Date
-
LeaderGuide Pro automatically drops in the date you started this facilitator guide as the Revision Date.
-
Type over the numbers to edit the date.
-
To edit the phrase "Revision Date" click Parts on the ribbon. Select LeaderGuide Pro Preferences and edit the text in the lower right portion of the Preferences wizard. Once set, your new text will apply to all new LeaderGuide Pro documents you create.
-
The Revision Date is repeated in the odd-numbered page footers in this document.
A two-column, two-row table.
-
This is a good place to add your legal and company information.
- You can edit the text, convert the table to text, or even delete this table.
Section Break
-
Do not delete this Section Break. It controls the headers and footers throughout the document.
- You can see this because Word's formatting marks are showing.
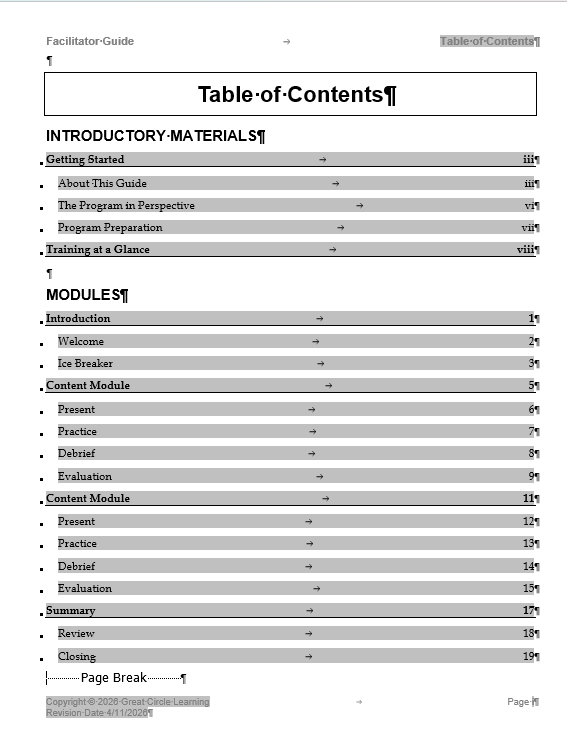
Table of Contents
Do not type on this page.
LeaderGuide Pro automatically builds this page for you.
The Table of Contents displays the contents within two sections: Introductory Materials and Modules (instructional content).
-
Modules are left justified
-
Lessons are indented below the Module they are in
The Table of Contents will flow over to subsequent pages as needed as you add content to your document.
Page Break
-
A Page Break sits at the end of your Table of Contents to separate it from the next portion of content.
-
Do not delete the Page Break.
To navigate to any of the pages listed in the Table of Contents:
-
Hover your cursor of the page number
-
Press CTRL + Click to go to that page
To add more Modules and Lessons to the Table of Contents:
-
Go to the location in the document where you want the new Module or Lesson to sit
-
Click the Module or Lesson button in the Module/Lesson Control group on the LeaderGuide Pro ribbon
-
Click the Update All Fields button in the Controls group on the LeaderGuide Pro ribbon
To remove Modules and Lessons from the Table of Contents:
-
Click Librarian in the Module/Lesson Control group on the LeaderGuide Pro ribbon
-
Click the Delete Modules or Lessons
-
Select the Modules or Lessons to delete & click OK
To update the Table of Contents:
-
Edit Module Names on the Module Overview pages
-
Edit Lesson Names on the first page of a Lesson
-
Click the Update All Fields button in the Controls group on the LeaderGuide Pro ribbon
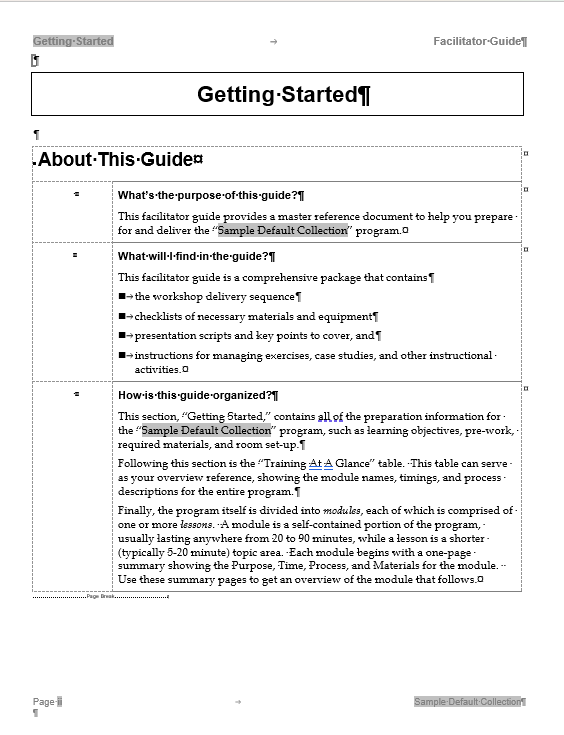
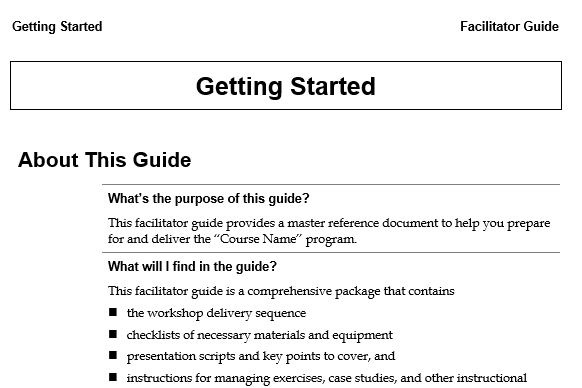
Getting Started
This information orients the facilitator to this facilitator guide.
Do not delete the pages in this section.
You can customize or eliminate this section using the included LeaderGuide Pro Customization tools.
You can also manually edit the text.
-
To save time, we recommend customizing this section - so that you only have to do the work once.
-
To learn more about customizing, please contact us.
The text that you see highlighted in gray is a field that contains your Program Name (the course name) which is carried over from your cover page. To edit this:
-
Go to your Cover page
-
Edit the Program Name
-
Click Update All Fields in the Controls group on the LeaderGuide Pro ribbon
The default Getting Started text included in your new facilitator guide flows over two pages.
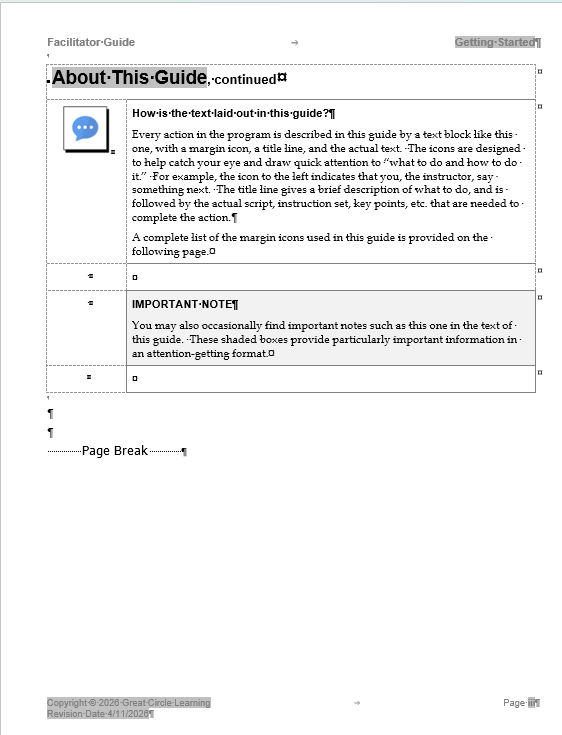
Getting Started, con't.
This is the rest of the Getting Started information.
On this page you see:
-
An example of how a Lesson name appears when the "Lesson, continued" feature is applied
-
An example of a LeaderGuide Pro Content Block.
-
Content Blocks are used to chunk the the instructions that are added to the Lesson pages.
-
-
An example of an Important Note Block.
-
Important Note Blocks are used to call the Facilitator's attention to important information.
-
-
A Page Break
-
Do not delete the Page Break
-
You can edit and customize the content on this page.
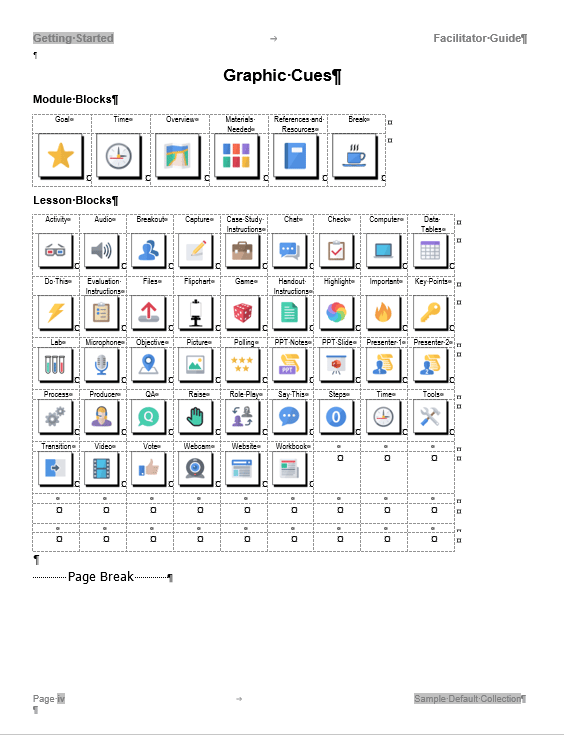
Graphic Cues
This page displays the icons associated with the Collection in use.
Icons are used at the start of Content Blocks to visually cue the facilitator.
This page informs the Facilitator what the icons look like and what they mean.
Once your facilitator Guide is complete you can update this page to display only the icons that are actually in use in the document.
-
Click Special in the Controls group on the LeaderGuide Pro ribbon
-
Under More in the drop-down menu, select Graphic Cues
To use different icons:
-
Use the LeaderGuide Pro Attach function to update the document with a different Collection.
-
Or create a custom Collection with your custom icons. Contact us for assistance with this.
Do not delete or edit this page.
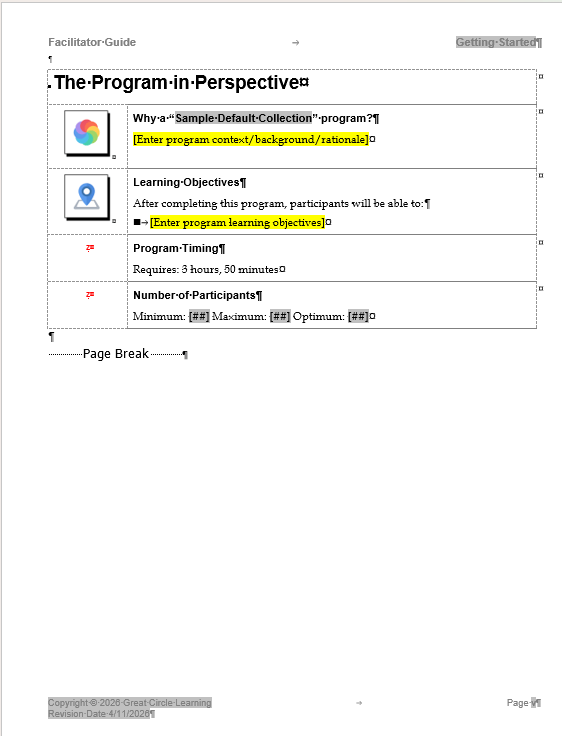
Program in Perspective
This page contains placeholders for information that puts the course in perspective for the facilitator.
The text highlighted in yellow is meant to be overwritten with the appropriate information.
What you add to the first two Content Blocks on this page will be extracted into your Participant Guide if you choose to use the LeaderGuide Pro Extract function to create a Participant guide for the course.
The Program Timing is calculated by LeaderGuide Pro based on the Lesson time that you enter.
-
If you choose not to use Lesson Times, this information is calculated from the Module Times you enter on the Module Overview page. When using Lesson Times, the Module times are calculated for you.
The Program Timing, Module Times, and Lesson Time blocks are updated every time you click the Update All Fields button in the Controls group on the LeaderGuide Pro ribbon.
You can add information to this page if needed, and the page will flow to subsequent pages.
Do not delete the Page Break.
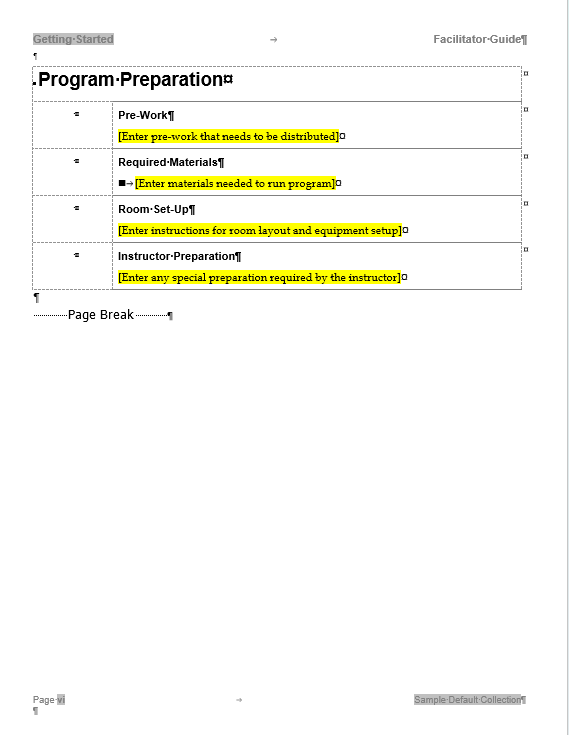
Program Preparation
This page contain placeholders information the Facilitator needs to prepare for the training delivery.
The best thing about this page is that it's always in the same place in every facilitator guide you create so your instructors always know where to find this important information.
You can add additional information to this page as needed. The page will flow over to subsequent pages.
Use this page to capture everything the facilitator needs to gather, do, and know before starting the live delivery of the training.
If you have standard protocols for your room layouts, technical set-ups, facilitator prep, etc. you can customize this page so that your important information always loads as you start a new facilitator guide.
Do not delete the Page Break.
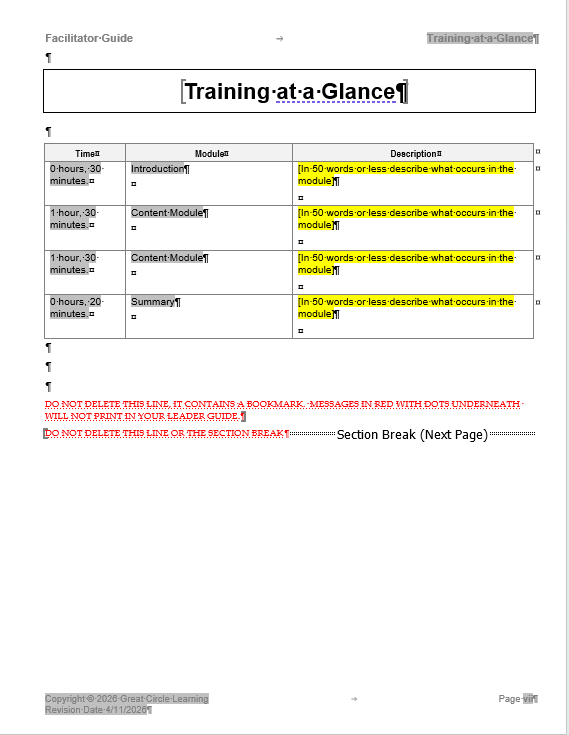
Training at a Glance
This page is generated for you, to give the facilitator a high-level overview of the training.
The information on the page is drawn from the Module Overview pages in your facilitator guide.
Do not delete this page.
Do not type on this page.
To edit the content on this page:
-
Go to the appropriate Module page and make the edits there.
-
Then click Update All Fields in the Controls group on the LeaderGuide Pro ribbon.
As you add Modules and Lessons:
-
Click the TAG button in the Controls group on the LeaderGuide Pro ribbon to update this page.
This page will flow over to subsequent pages as needed.
DO NOT edit or delete the red text or Section Break at the end of the Training at at Glance.
-
You will not see the red text or Section Break if Word's formatting marks are turned off.
If you do not want to include the Training at a Glance in a Facilitator Guide:
-
Select the option to Exclude TAG in the Start a New Guidebook Wizard as you are starting a new facilitator guide.
-
If you forgot to exclude the Training at a Glance as you started a Facilitator Guide you can use the LeaderGuide Pro Extract function to extracct evreything in a new faciltator guide - this time selecting the option to Exclude TAG in the Start a New Guidebook Wizard
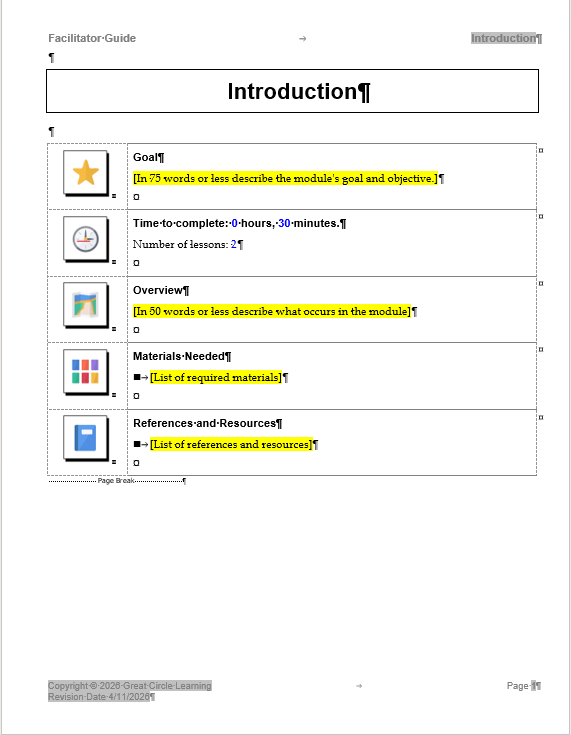
Module Overview
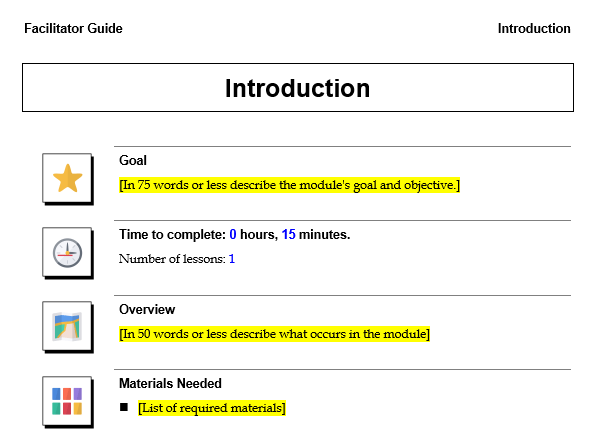
This Page marks the start of the Modules section, which contains the instructional content.
The Module Overview page always sets up the same way and contains the same place holders for the:
-
Module Name
-
Module Goal
-
Module Time
-
Module Overview
-
Materials Needed - for just this Module
-
References and Resources - for just this Module
Do not add additional content to this page.
Do not delete the Page Break.
The purpose of this page is to orient the trainer to what they will be doing for just this portion of the training program.
The actual instruction begins on the next page, which is the first Lesson.
New Lesson
This page is the start of a new lesson.
It includes the Lesson Name and the Lesson time Block.
In the page header you can see the name of the Module this lesson sits within.
You will build out this page by adding Content Blocks from the LeaderGuide Pro ribbon and then typing or pasting content in the blocks.
The lesson will flow over to subsequent pages as needed.
Do not delete the Page Break at the end of the Lesson.
Every new Lesson must start on a new page.

This first portion of your new facilitator guide includes:
-
Cover page
-
Acknowledgements page
-
Table of Contents

This second portion of your new facilitator guide contains:
-
About this Facilitator Guide/Getting Started
-
Icon/Graphic Cues
-
Training Program in Perspective
-
Training Program Preparation
-
Training at a Glance
This third section of your new facilitator guide contains the instructional material to be used by your facilitator to deliver the training:
-
First New Module
-
First New Lesson
-
Additional Lessons in Module
-
-
Next Module
-
First Lesson in Module
-
Additional Lessss in this Module
-
-
Subsequent Modules & Lessons
You have the option to add an Appendix as a fourth section to your facilitator guide. This section can hold reference materials for the facilitators and the participants.