
Preparation
Create a Custom Cover Page
A cover page is provided, and you can modify it to meet your needs
Overview
When you start a new Learning Design document, it begins with a Default Cover Page.
-
You can use the default cover page to create a custom cover page that will display your logo and your colors.
-
You can then modify your custom cover page as need to create a variety of custom cover pages.

To get started
-
Open Word and click the Learning Design Tool tab along the top of your screen
-
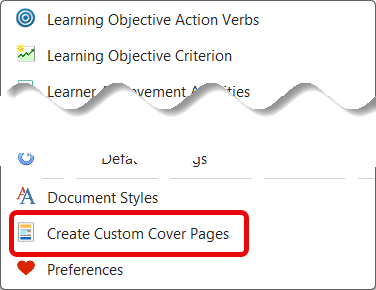
Click the Customize button on the Learning Design Tool ribbon.
-
Select Create Custom Cover Pages from the drop-down menu
-
The Create or Modify Cover Pages wizard will open.


Follow these steps to create a Custom Cover Page
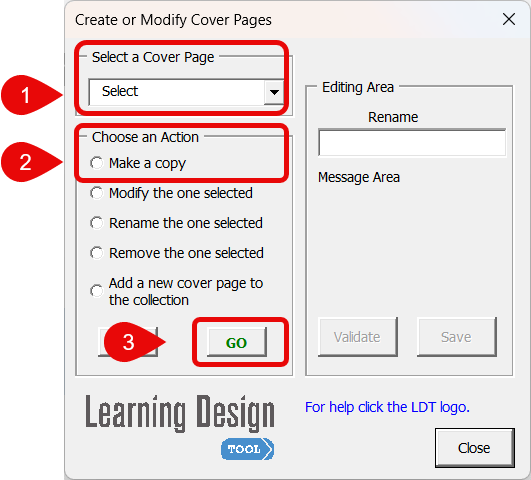
Step 1: Use the Create or Modify Cover Pages wizard to get started
|
|
Step 2: Select the COPY to rename
|
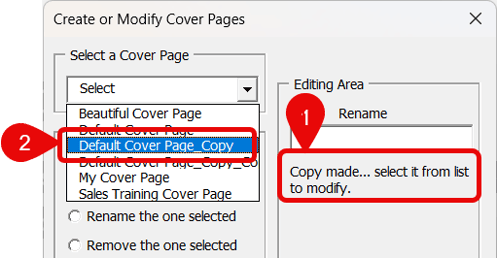 |
Step 3: Rename the copied Cover page
|

|
Step 4: Edit the Cover Page name
|

|
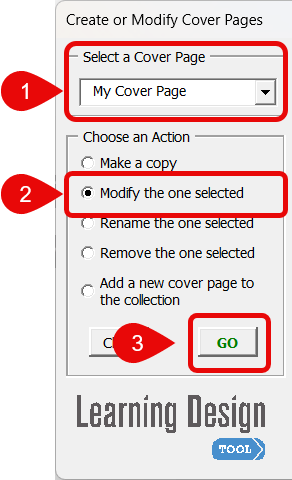
Step 5: Select Your Cover to Modify
|
|
Step 6: Make your edits to your new Cover Page
|

|

|
About the Default Cover PageA. At the top left of the page is a Paragraph Mark.
B. Also along the top of the page is placeholder for the Course ID
C. Next is a logo placeholder
D. The phrase "New Design Plan" is a placeholder
E. The phrase "Instructional Systems Design Document" is a document identifier
F. The phrase "Design Plan" can be edited |
|
NOTE: The Default Cover page is set up with a table, to help keep things in place on the page. To remove the table and simply work on the page:
|

|
