
Basics
About the Start a New Guidebook Wizard
Use It to Begin the Set Up a New Facilitator Guide or Participant Guide

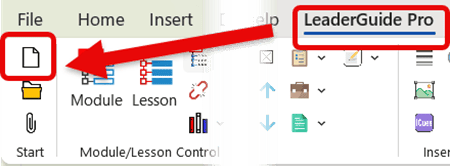
1. The New button on the LeaderGuide Pro ribbon in Word
-
Click this button to initiate the start of a new Facilitator Guide or Participant Guide
2. You will see the Start a New Guidebook wizard
-
You will use this wizard to establish the specifics of your new guidebook

|
TIP: When in doubt - use the default settings You will always be able to make changes to the initial settings you choose here Because LeaderGuide Pro makes it easy to extract new guidebooks from existing ones. |
3. Let's walk through the fields of this wizard
Name & Course ID
-
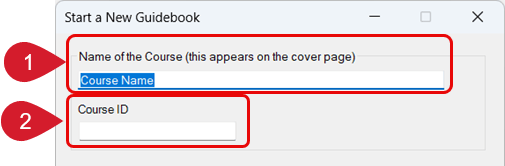
Name: Type in the name of your course
-
The course name you add here will populate as your file name when you are initially prompted to save. You can change the file name as needed
-
This name will also appear on the cover page, in the About This Guide section, and in the even-numbered page footers of your new guidebook
-
Once you are in your new guidebook, go to the cover page to edit the name if needed. Your new name will automatically update everywhere else
-
-
Course ID: Type in an optional course ID.
-
The ID can be used to search for your guidebook in Windows File Explorer
-
Type & Columns

-
Type: Select Facilitator or Participant
-
Optionally you can also select Content Part, which builds just a Module and Lesson chunk
-
eLearning Reference will create a guidebook to align with an Articulate course
-
-
Columns: We recommend using 3-column for Facilitator Guides and 2-column for Participant Guides
-
You will have the option to adjust the number of columns for specific Content Blocks as you start working in your guidebook
-
|
TIP: Build your Facilitator Guide first Because your facilitator guide will be the most comprehensive guidebook you create So it will be easy to use the LeaderGuide Pro Extract function to extract a Participant Guide from your Facilitator Guide. |
Collection Name & Print
-
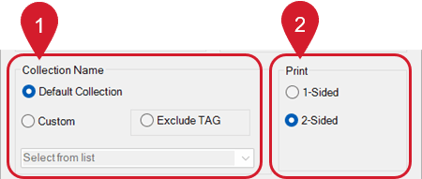
Collection Name: Select the Collection to use to apply the cover page design, fonts, styles, and icons that will be used to establish the look & feel of your new guidebook
-
The Default Collection is set as your preferred Collection when you first start using LeaderGuide Pro
-
Click Custom to see the list of included Collections
-
-
Print: We recommend leaving this setting as 2-Sided
-
-
This way, if you print your Guidebook, it will be set up properly - like a book.
-
|
TIP: As you are getting started with LeaderGuide Pro: We recommend starting a new Facilitator Guide with each Collection. Use the Collection Name as the Course Name. This allows you to compare the Collections and choose the one(s) you prefer as you create new guidebooks. |
Help & Preferences & Ok/Cancel
-
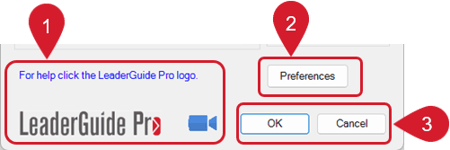
Help: Click the LeaderGuide Pro logo for written instructions, or click the blue camera to be taken to a video
-
Preferences: Click this to be taken to the wizard that allows you to set global settings that will apply to all new guidebooks you create
-
For example, you can use Preferences to:
-
Import your Logo to appear automatically on your cover pages
-
Set your Copyright to insert automatically
-
Set your Preferred Collection
-
-
-
OK: Click OK to initiate the start of the build out of your new guidebook
-
-
Hand off mouse after you click OK
-
Follow the prompts to complete the build out of your new guidebook
-
-
-
-
Save your new guidebook
-
Use the Guidebook Design Template to add your course outline
-
Optionally import PowerPoint
-
-
Learn About
- Collections
- Content Parts
- Preferences
Next Steps
- Add a Course Outline with the Guidebook Design Template
- Import PowerPoint
- Get to Know your New Guidebook