
Basics
About the Guidebook Design Template Wizard
Use it to Add a Course Outline into a New Facilitator Guide or Participant Guide

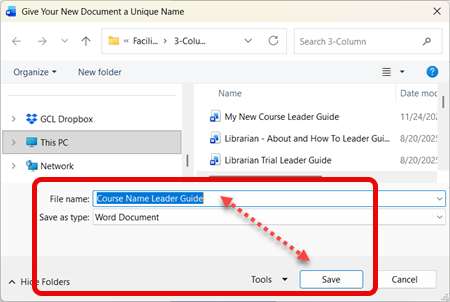
1. As you start a new facilitator or participant guide, you are prompted to Save
-
LeaderGuide Pro Facilitator Guides and Participant Guides are Word documents
-
So you must Save them - like any other Word file.
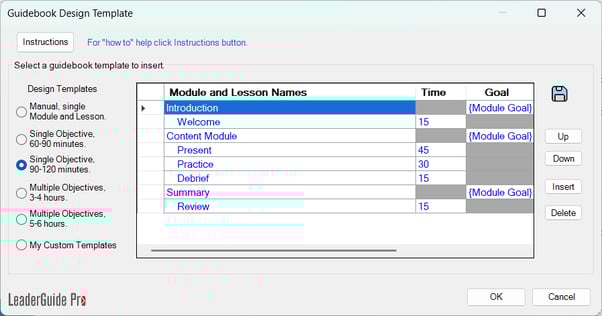
2. After saving, you will see the Guidebook Design Template wizard
-
Use this wizard to add at least a starting point course outline into your new guidebook
-
LeaderGuide Pro provides some starting point options, based on the LeaderGuide Pro document structure of Modules and Lessons
-
Modules and Lessons are key components of every LeaderGuide Pro Guidebook
-
Every Facilitator Guide and Participant Guide has at least one Module with at least one Lesson
-
-
The Design Template wizard is set up to hold a Heading 1 - Heading 2 outline format
-
Heading 1 is a Module (Topic)
-
Heading 2 is a Lesson (Subtopic)
-
-
-
The wizard also includes placeholders for Lesson times and Module goals
|
TIP: When in doubt - use one of the include outlines Because, once you are in your new guidebook, you will be able to make changes to the initial outline you choose here. LeaderGuide Pro makes it easy to:
|
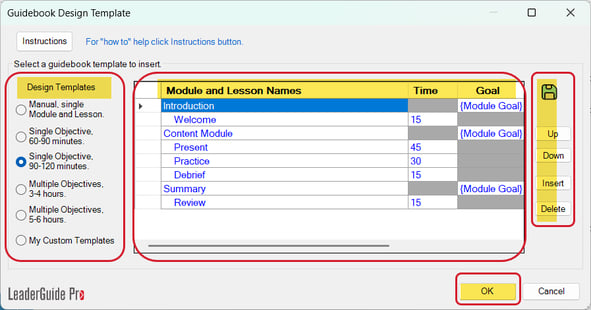
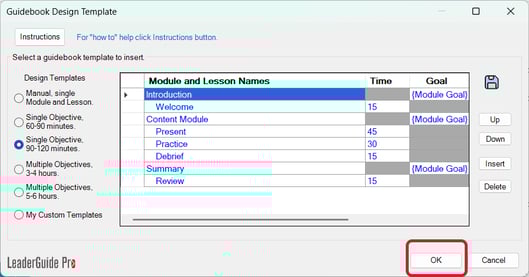
3. There are four key sections in the Design Template Wizard
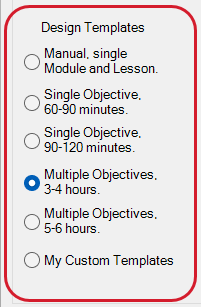
Design Templates
1. Use the Design Templates section to get started
-
Select one of the included starting point course outlines
-
Manual, single Module and Lesson adds one new Module and one new Lesson
-
Single Objective, 60-90 minutes adds one new Module and five new Lessons
-
Single Objective, 90-120 minutes adds three new Modules and five new Lessons distributed across the modules *shown in image below
-
Multiple Objectives, 3-4 hours adds four new Modules and eleven new Lessons distributed across the modules
-
Multiple Objectives, 5-6 hours adds six new Modules and sixteen new Lessons distributed across the modules
-
My Custom Templates adds one of your saved course outlines
-
|
TIP: Edit one of the included outlines to fit your needs and click the Save icon
To use a saved outline click My Custom Templates
|
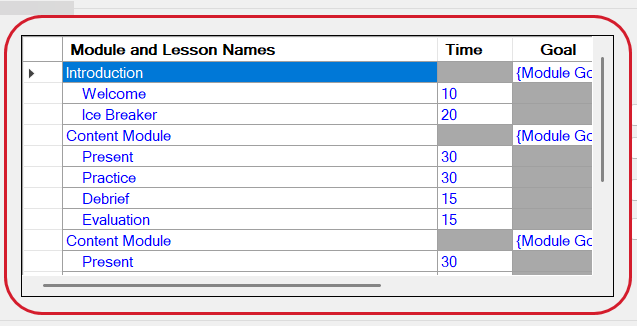
Module and Lesson Names
2. Use the Module and Lesson Names section to flesh out your outline
-
Type over the default text with your module and lesson names, lesson times and module goals
-
What you add here can be edited in your new guidebook
-
-
Module names are left justified
-
Lesson names are indented 3 or 4 spaces
-
Lesson times are in minutes only
-
Module goals are concise statements of what the participants will learn in the module
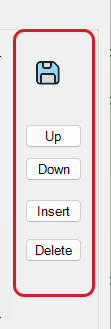
Additional Actions
3. Use the Additional Actions area to fine-tune your outline
-
SAVE: Click the Save icon to save a course outline for future use
-
UP: Highlight a Module or Lesson name to move it up in the outline
-
DOWN: Highlight a Module or Lesson name to move it down in the outline
-
INSERT: Click to add a Module/Lesson name placeholder line immediately below your cursor
-
DELETE: Click to remove a selected Module or Lesson from the outline
OK
4. Click OK to add the outline into your new guidebook
-
If you click Cancel then a single new Module and new Lesson will be added into your new guidebook
-
Hand off mouse after you click OK
-
Follow the prompts to complete the build out of your new guidebook
Learn About
- Collections
- Content Parts
- Preferences
Next Steps
- Import PowerPoint
- Get to Know your New Guidebook