About Adding Content

Good to Know

The Starting Point Document

Select an option below:

Your New Facilitator Guide is:

Logically organized into two main sections:
  • Introductory Materials - to help the instructors prepare

  • Modules & Lessons - to contain the instructional content & directions facilitators will use to deliver the training program

Professionally structured with:
  • Cover page

  • Acknowledgements page

  • Table of Contents

  • Module Pages

  • Lesson Pages

Professionally formatted with:
  • Headers & Footers

  • Section breaks & Page breaks

  • Page Numbers

  • Document-specific Style Guides

You will Notice

Word’s formatting marks are showing.
  • These are non-printing characters that indicate paragraphs, spaces, styles, page breaks, table cells and more.

  • They help you maintain the document's professional formatting.

  • They are always turned on while you are working in any LeaderGuide Pro document.

There are places where text is highlighted in yellow.
  • These are prompts for you to add specific content.

  • Place your cursor in them and start typing to replace the prompt and highlight.

There are at least 11 pages in your new Facilitator Guide.
  • There are at least 7 pages in your new Participant Guide.

  • These initial pages all have a purpose. Do NOT delete them.

The pages all have some default text on them already.
  • Most of the default text is sitting in table rows.

  • Table rows are used to maintain a consistent page layout.

  • As you add content you will be using Content Blocks, which are specially formatted and coded table rows.
The pages also have empty space.
  • Visual space helps with readability.

Introductory Materials

This section contains instructor preparation information.
Organized into these parts:
  • Getting Started

  • About This Guide

  • The Program in Perspective

  • Program Preparation

  • Training at a Glance

The Getting Started module contains:
  • Default content that explains how the guidebook is organized and laid out

  • A page displaying all of the icons available for use, along with their labels

  • Pages with placeholders for you to add course-specific content related to:

    • Program rationale

    • Learning objectives

    • Course timing

    • Minimum/maximum number of participants

    • Pre-work for participants

    • Required materials & technical requirements & room set-up

    • Instructor Preparation

The Training at a Glance (TAG) lists each:
  • Module name

  • Time required to run the Module

  • A brief overview of the Module

Modules

This section contains your instructional content.
Organized into:
  • Modules (topics)

  • Lessons (subtopics)

Modules contain:
  • A Module Overview page listing the Module:

    • Name, Goal, Time, Overview, Materials Needed, References and Resources

    • Ending with a Page Break

  • At least one Lesson

    • Containing the Module's instructional content

  • All pages in the Module include:

    • A Header showing the Module Name

    • A Footer with a page number and the Revision Date and Copyright (odd-numbered pages) or the Course name (even-numbered pages)

Lessons contain:
  • At least one page, showing the Lesson Name and:

    • A Lesson Time Block

    • An optional Lesson Objectives Block

    • Content Blocks added by you - to hold the instructional content

    • No Page Breaks

      • Because the Lesson pages flow naturally as you add content

Content Blocks contain:
  • In Column 1:

    • An icon to visually cue the facilitator

  • In Column 2:

    • A Headline to sum up what the trainer needs to do, followed by the instructional content (typed in by you) - or a slide image

  • In Column 3:

    • Space to use as needed for a slide image, or notes to the Producer, or extra information for the instructor or producer.

Everything in your new Facilitator Guide ...

DO
  • Take the time to get to know what you've been given

  • Keep the formatting marks showing

  • Use the LeaderGuide Pro ribbon

  • Let LeaderGuide Pro do the work for you

  • Work locally on your computer

  • Save your work using Word's Save function

  • Always save a "master copy" of your LeaderGuide Pro documents

has a purpose and is there for a reason.

DON'T
  • Delete the things LeaderGuide Pro has set up for you

  • Manually format

  • Copy and paste Icons

  • Manually change the PPT Block numbering

  • Delete or edit the non-printing read text

  • Delete the Section Breaks and Page Breaks added by LeaderGuide Pro


The LeaderGuide Pro Ribbon

Full LeaderGuide Pro Ribbon in Word

Always use the LGPro Ribbon to do your work.

Only use Word when the function you need is not available on the LGPro ribbon.

The LeaderGuide Pro ribbon buttons are grouped by functionality.

There are 9 groups.
1. Start 2. Module/Lesson Control 3. Text/Table Formatting
4. Controls 5. Content Blocks 6. Insert
7. Customize 8. Product  9. Help
 

Full LeaderGuide Pro Ribbon in Word

  • Hover your cursor over a ribbon button to see a screen tip explaining what the button does for you.

  • Cursor placement is important for functions that involve formatting and inserting Modules, Lessons, Content Blocks, text, images, tables, cases, assessments, handouts, lines for note taking.

  • Many of the buttons, once clicked, kick off a series of actions that you must allow time to complete.

  • Always keep the full LGPro ribbon displayed as you work in a LeaderGuide Pro document.

Full LeaderGuide Pro Ribbon in Word

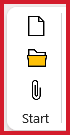
Start
Start group on the LeaderGuide Pro ribbon


There are three buttons in this group
  • Start a new Guidebook

  • Open an existing Guidebook

  • Attach a Collection


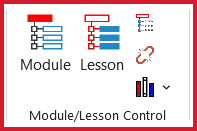
Module/Lesson Control
Module-Lesson Control group on LeaderGuide Pro ribbon


There are five buttons in this group
  • Module - to insert a new Module

  • Lesson - to insert a new Lesson

  • Continue Lesson - to carry over the Lesson Name

  • Break - to insert a Break

  • Librarian - to Archive, Reorder, Delete or Insert Archived Modules and Lessons


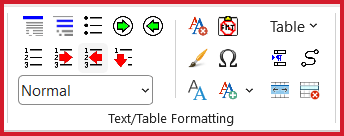
Text/Table Formatting
Text-Table Formatting group on LeaderGuide pro ribbon


There are twenty-one buttons in this group
  • Headline, Text, Bullet, Demote, Promote - to work with text you add into the Content Blocks

  • Numbered List, Demote, Promote, Restart Numbering - to work with numbered lists you add into the Content Blocks

  • Style - displays the Style of the spot where your cursor is sitting 

  • Clear Format, Paste Special, Table - to remove formatting from text, paste in content from another source without the source formatting, and to add tables into the Content Blocks

  • Single Line, Correct Answer, Break Table, Flow Table - to add a line for participants to write on, to mark correct answers as text that can be hidden from participants, to break the table flow between Content Blocks, and to allow Content Blocks to flow from one page to the next

  • Styles, Your Styles, Merge or Split Cells, Delete Table Row - to access Word's Styles, your added Styles, merge or split cells in Content Blocks, and to delete a Content Block


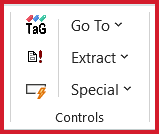
Controls
Controls group on LeaderGuide Pro ribbon
 
There are six buttons in this group.
  • TAG - to update the Training at a Glance after adding new Modules and Lessons

  • Update All Fields - to update the various fields in the document, including the Table of Contents, TAG, and PPT Block numbering

  • AutoCorrect - to access Word's AutoCorrect function to create shortcuts for frequently used words and phrases

  • Go To - to navigate within the document

  • Extract - to extract new guidebooks from existing, assessments, cases, handouts, agendas, audit data

  • Special - to access controls for working with PowerPoint and images


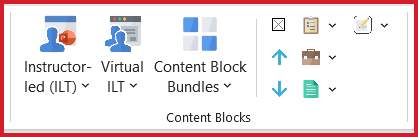
Content Blocks
Content Blocks group on LeaderGuide Pro ribbon


There are ten buttons in this group.
  • Instructor-led (ILT) - to open the drop-down menu of Instructor-led Training Content Blocks  

  • Virtual ILT - to open the drop-down menu of Virtual ILT Content Blocks 

  • Content Block Bundles - to add a series of Content Blocks with one click

  • Empty - to add a Content Block that does not contain an icon in column 1

  • Evaluation Blocks - to add extractable Evaluation Instructions and Evaluation Content Blocks

  • Capture Notes - to add a Capture Notes Block or a Capture Notes page

  • Move Content Block Up - to move a Content Block up a Lesson page

  • Case Study Blocks - to add extractable Case Study Instructions and Case Study Content Blocks

  • Move Content Block Down - to move a Content Block down a Lesson page

  • Handout Blocks - to add extractable Handout Instructions and Handout Content Blocks

  • Capture Notes - to add a Capture Notes lined page or a Capture Notes Content Block


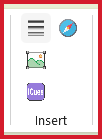
Insert
Insert group on LeaderGuide Pro ribbon


There are four buttons in this group.

Capture Lines - to insert two lines into a Content Block 

Navigation Task Pane - to open a display that helps you navigate to various places in your document

Insert Pictures and Text Objects - to capture and insert text and objects from other documents into Content Blocks

 ICues - to insert small graphic cues into Content Blocks, including a time marker to allow you to specify how much time should be spend on a particular activity


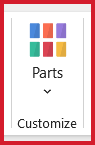
Customize
Customize group on the LeaderGuide Pro ribbon


There is one button in this group.
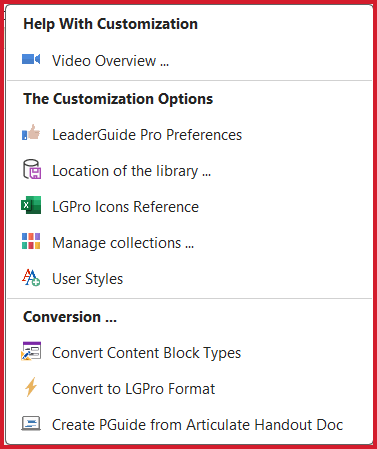
  • Parts - to open a drop-down menu of customizing options

Customize group drop-down menu


Product
Product group on the LeaderGuide Pro ribbon


There is one button in this group.
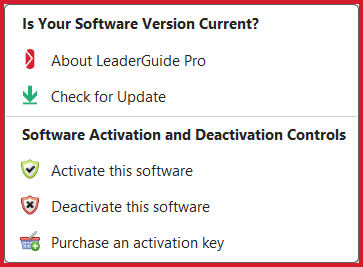
  • Act'n DeAct - to open a drop-down menu of software options

Product group menu


Help
Help group on LeaderGuide Pro ribbon


There is one button in this group.
  • v16.0 - to open a drop-down menu of help options


Do this instead of using Word's Undo function
  • Text - highlight the text that needs reformatting

    • and use the buttons in the Text/Table Formatting group

  • PPT Block Numbering - if the slide numbering is not updating

    • insert a new PPT Block from the Instructor-led ILT Content Blocks below the nonfunctioning block

    • move the content into the new block

    • click Update All Fields

    • put your cursor in the old block and click Delete Table Rows in the Text/Table Formatting group

  • Content Block issue - if you inserted the wrong Content Block or it's in the wrong spot

    • to remove a block you don't need, put your cursor in the block and click Delete Table Rows in the Text/Table Formatting group

    • to move a Content Block up or down the page, click the Move Up or Move Down arrows in the Content Blocks group 

  • TAG - if clicking the TAG button does not update your Training at a Glance page

    • place your cursor before the start of the first Lesson in the Module that is not showing up

    • click Module in the Module/Lesson Control group

    • transfer content to the new Module page

    • remove the old page

    • delete the extra Section Break

    • click TAG in the controls group


Text-Table Formatting group on LeaderGuide pro ribbon
Text/Table Formatting group


Content Blocks group on LeaderGuide Pro ribbon
Content Blocks


Update All Fields Button   

Update All Fields   


Delete Table Rows_Text-Table Formatting

Delete Table Rows


Move Blocks Up Down

Move Blocks Up/Down


Insert ModuleInsert Module


TAG buttonTAG button