Overview
A LeaderGuide Pro Facilitator Guide is designed to serve instructors in two ways:
-
As a training preparation study guide and pre-delivery checklist
-
As a training delivery roadmap with clear, concise and complete information and directions
A Facilitator Guide is the master resource containing everything required to deliver the training
📍TIP: A Participant Guide can be Extracted from a Facilitator Guide
Building a Facilitator Guide first and then Extracting a Participant Guide allows you to automatically:
- Sync content updates from one guidebook to the other
- Insert Participant Guide Page References into the Facilitator Guide
Standard Facilitator Guide Structure
Section 1 Section 2: Preparation
Section 3: Delivery Optional Section 4: Appendix
|
|
A New Facilitator Guide - Page by Page
Cover Page

Facilitator Guide Cover page created with the Elegant Collection
This screenshot is taken in Word
Word's formatting marks are showing
LeaderGuide Pro turns the formatting marks on
Let's take a closer look at the elements found on a cover page ...

|
Department or Division: Optional - can be deleted Guidebook Type: Also appears in the page headers - can be customized Logo: Customize with your logo Program Name: The course name entered when starting the new guidebook - edit on this page - do not change the Style - can be customized Graphic Design – Each Collection has a different cover page - can be customized - Curriculum or Subject Area – Optional - can be deleted Course ID – Optional - can be deleted - if used, it is a searchable field within File Explorer Page Break – Only visible when Word's formatting marks are on - Do not delete this page break |
The Acknowledgements Page
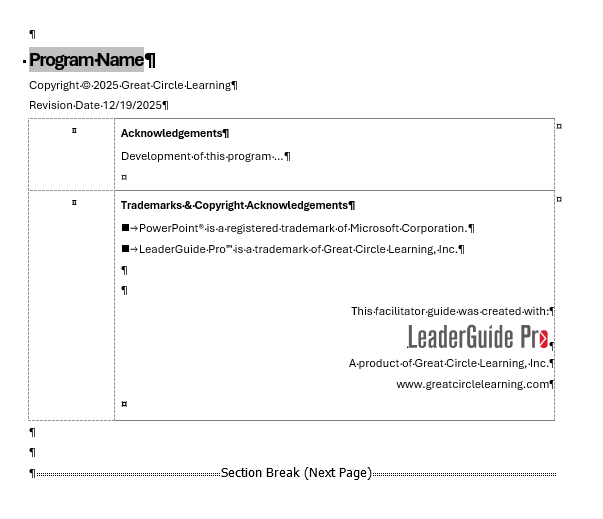
This page appears right after the Cover page in both the facilitator guide and the participant guide - can be customized
The Acknowledgements page contains:
|
|
The Program Name: Repeats from the Cover page at the top of this page - Edit on the Cover page and then click Update All Fields in the Controls group on the LeaderGuide Pro ribbon Copyright and Revision Date: Do not delete or change the styles – To edit click Parts>LeaderGuide Pro Preferences on the LeaderGuide Pro ribbon – this information repeats in odd-numbered page footers Acknowledgements: Acknowledge Program Contributors or use this space as need – this is a table row Trademarks & Copyright Acknowledgements: Placeholder for copyrights of materials from other sources, legal notices and contact information - this is a table row Section Break: Do not delete - this only shows on the screen when Word's formatting marks are on |
Table of Contents
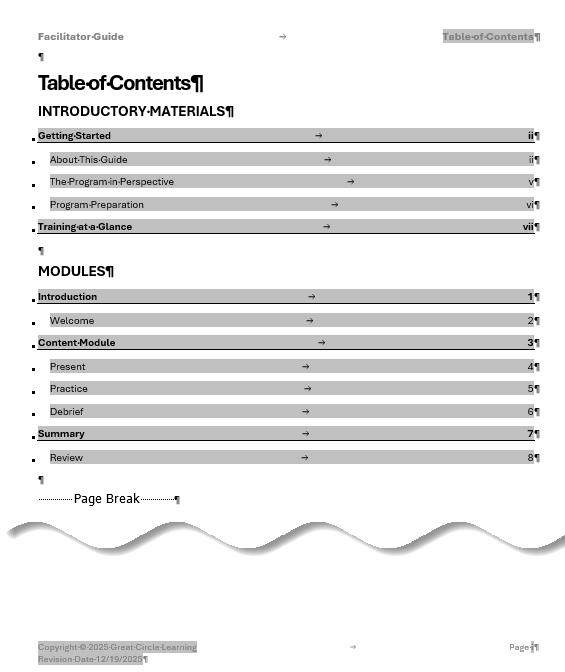
The Table of Contents (TOC) builds automatically and appears right after the Acknowledgements page in both a facilitator guide and a participant guide
The initial TOC will list the Modules and Lessons from the Guidebook Design Template entered as the new document was created
The TOC will automatically flow over to subsequent pages as additional Modules and Lessons are added
Do not type on the Table of Contents page
- Edit Module or Lesson names on the appropriate Module Overview page or the first page of a Lesson and then click Update All Fields on the LeaderGuide Pro ribbon
- The TOC will update any time you click Update All Fields
Beginning on the Table of Contents page
The TOC ends with a Page Break – Only visible when Word's formatting marks are on - Do not delete this page break
- Headers will show the guidebook type and the Module you are in
- Footers will start showing page numbers that update automatically as you add content, as well as
- the Copyright and Revision date info on odd numbered pages
- the course name on even numbered pages
Getting Started: About This Guide
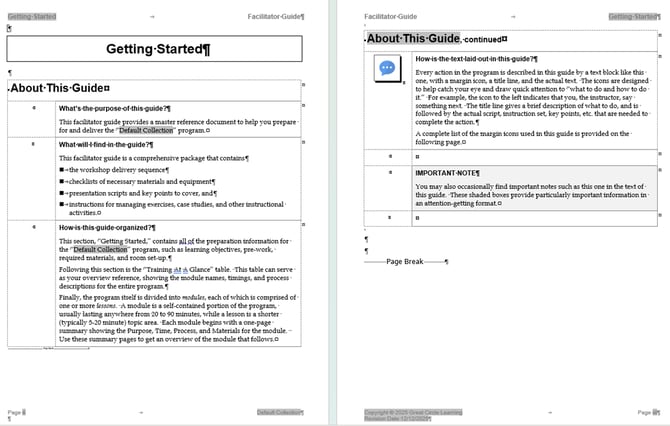
The About This Guide pages are only in a Facilitator Guide
They provide information about the facilitator guide's
- purpose and organization
- and how the instructional text is laid out
These pages can be customized - and you can create a custom Collection that does not include these pages
The text highlighted in grey indicate fields that LeaderGuide Pro populates for you
Do not delete the page breaks
Getting Started: The Graphic Cues Page
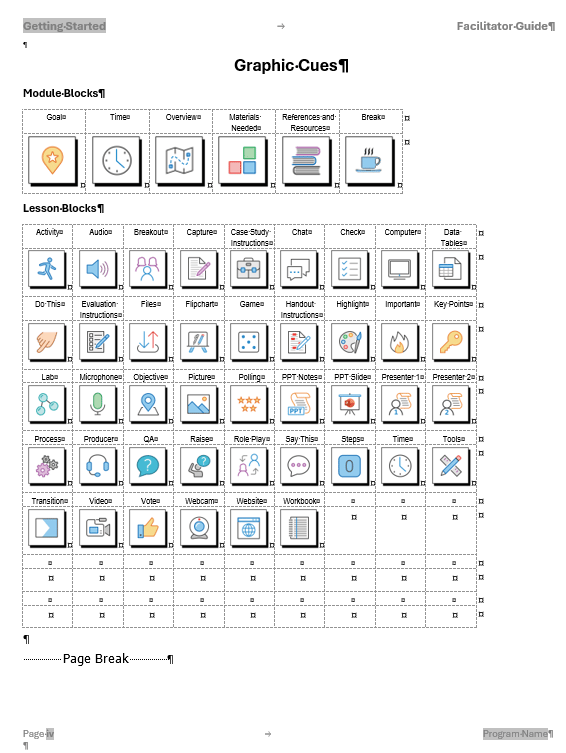
Example of the Graphic Cues Page from a Facilitator Guide Created with the Elegant Collection - this page is only in a Facilitator Guide
The Graphic Cues page:
- Displays the icons included in the Collection chosen when the Facilitator Guide was created, including
- Module Overview Page icons and their names
- Lesson Page icons and their names
- Can be modified to display only the icons in use in the Facilitator Guide - once the guidebook is finished
- Contains a Page Break - do not delete it
About icons:
- Each LeaderGuide Pro Collection has the same set of icon types/names
- with different icon graphics - to provide design options
We can help you add your own custom icons
Getting Started: The Program in Perspective and Program Preparation Pages
The Program in Perspective and Program Preparation pages are only in a Facilitator Guide
|
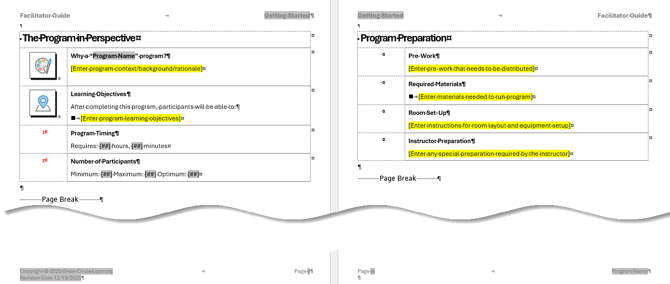
Program in Perspective - Provides an overview of the training program to orient the facilitator, including: Why a "Program Name" program?
Learning Objectives
Program Timing
Number of Participants
|
Program Preparation - Practical things the Facilitator must do/request/order prior to training delivery, including: Pre-Work
Required Materials
Room Set-Up
Instructor Preparation
|
The Training at a Glance
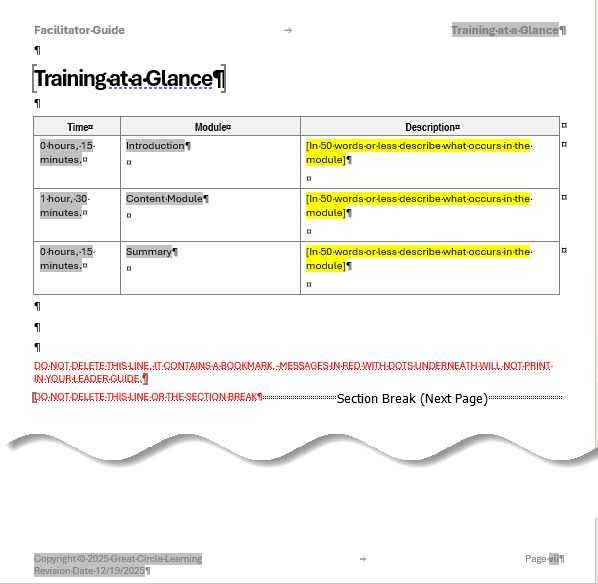
Found only in a Facilitator Guide, the Training at a Glance is a a table that builds automatically, to give facilitators a high-level overview of the training program they are about to deliver, including:
- The name of each Module in the training program
- The time required to deliver each Module
- A brief overview of what goes on in each Module
The information that populates this page is drawn from the Module Overview pages in the Facilitator Guide
This page will flow over to additional pages as needed
To update this page:
as you add, move or remove Modules:
click the TAG button in the Controls group on the LeaderGuide Pro ribbon
as you edit content on an existing Module Overview page:
click the Update All Fields button in the Controls group on the LeaderGuide Pro ribbon
❓The Red Text
This page contains non-printing RED TEXT and a Section Break
Do Not Delete any of this stuff
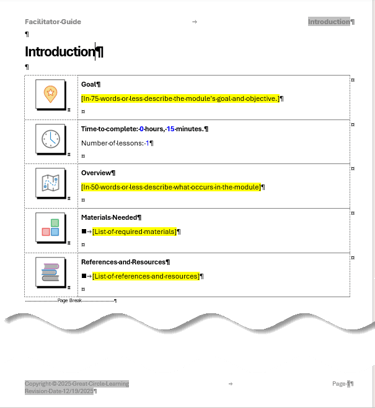
The Module Overview Page
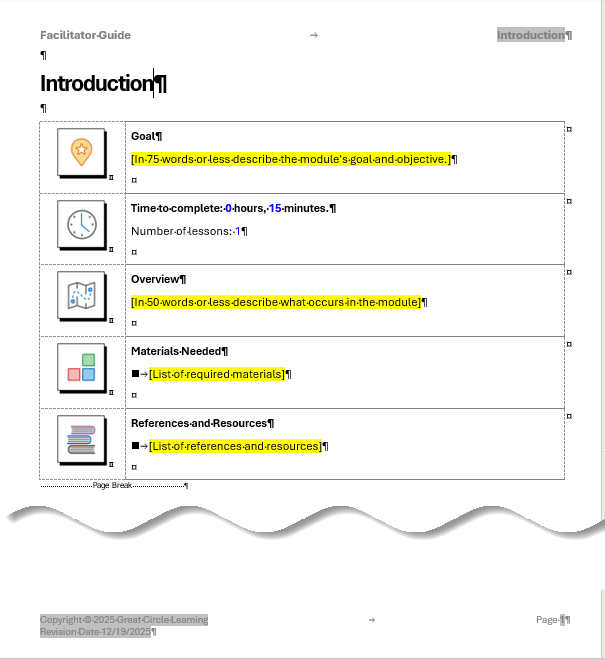
Only in a Facilitator Guide, a Module Overview Page orients the facilitators to what they will be doing and what they need to have on hand to deliver just this chunk of the training
⭐Good to Know:
The Module Overview page is meant to be a stand-alone page containing only the elements you see here - included by LeaderGuide Pro
Each new Module in your Facilitator Guide will begin with a Module Overview page
And each Module Overview page will be followed by at least one Lesson
The components of a Module Overview page include:
|
|
The Page Header shows the Module name and Guidebook type The Module Name - also appears in the Table of Contents and in the Training at a Glance -
Module Goal - a placeholder for this Module's terminal learning objective Module Time - a placeholder for the time it takes to complete this Module
Module Overview - a placeholder for a brief description of what takes place in this module
Materials Needed - a placeholder for the materials needed to run just this module References and Resources - a placeholder for extra materials that may be of benefit to the facilitator and/or participants The Page Footer - New Modules start on odd-numbered pages NOTE: This page contains a Page Break - do not delete |
The New Lesson Page
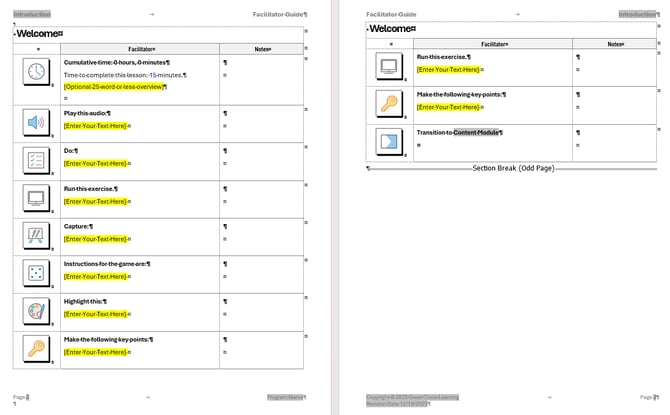
This example shows a new Lesson named "Welcome" which has automatically flowed over to the next page
Edit the Lesson Name on the first page of a Lesson
As text and images are added into the Content Blocks some of the blocks may shift over to the next page - this is normal
Lesson pages are built with Content Blocks that are inserted from the LeaderGuide Pro ribbon
Content Blocks can be added as needed
A Lesson is meant to be a continuous table that flows until a new Lesson or a new Module is added
Content Blocks
Content Blocks chunk information into manageable pieces, making the training easier to follow and apply
|
Content Block Examples Facilitator Guide |
|

The last page of a Facilitator Guide
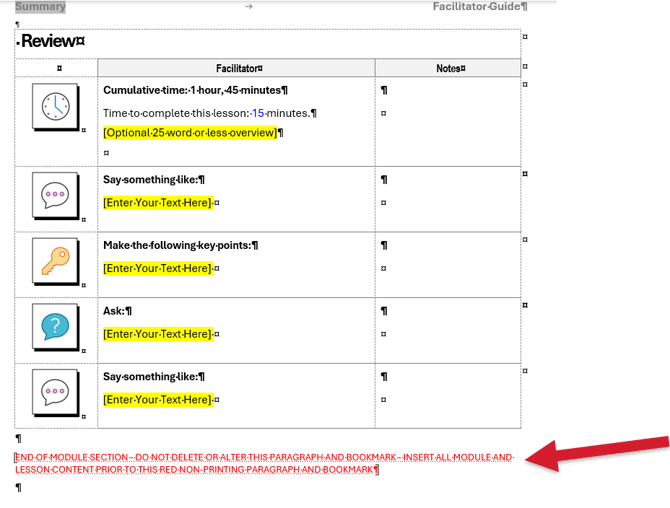
At the end of the last page of a Facilitator Guide:
- you will see non-printing red text - as long as Word's formatting marks are on
- and this MUST remain the very last thing in your guidebook
Do not delete or type in the red text
Learn More
Participant Guide Walkthrough